
Where to Hang Curtain Holdbacks
Where to Hang Curtain Holdbacks
Introduction:
What’s more rewarding than hanging a brand-new curtain in your bedroom or living room? Curtains can be functional; however, they also serve an aesthetic purpose. When you open the curtains at dawn, the way they’re placed will bring an elegant aesthetic to the space. Where to put curtain holdbacks is an issue that many people begin to ask.
The use of a holdback in curtains lets you create a distinctive appearance. If you’re looking for an elegant, traditional style, a holdback allows you to form an area of water on the floor or even graze the floor. Identifying the perfect place to put curtain holdbacks on walls will give you the desired appearance in your space.
You’ll often put holdbacks at least a third of the wall from the floor. Positioning them higher or lower will create the appearance of symmetry. There’s more to the correct holdbacks than you realize, and this article will explain all you need to learn to be a décor guru.
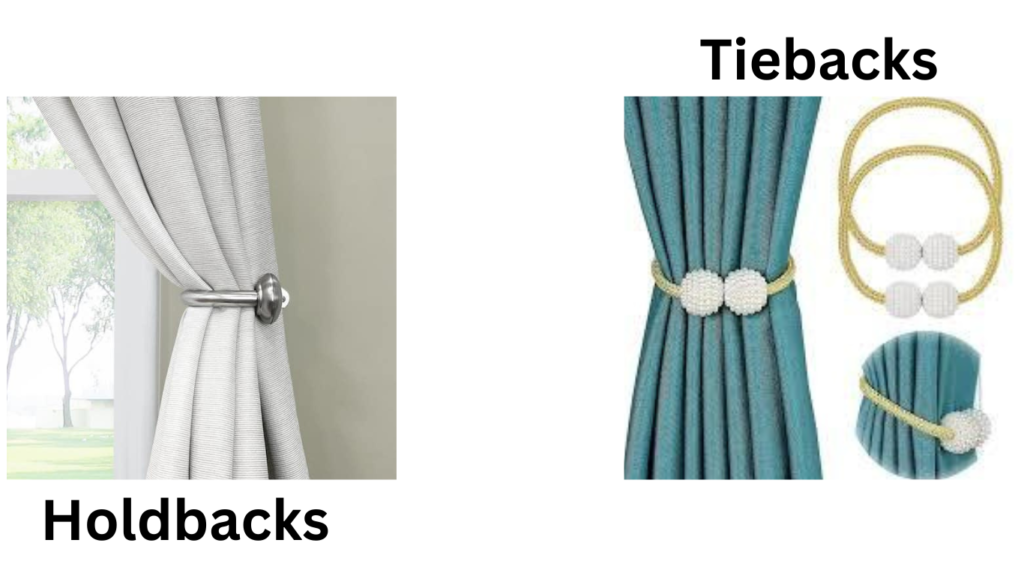
What’s The Difference Between Holdbacks & Tiebacks?
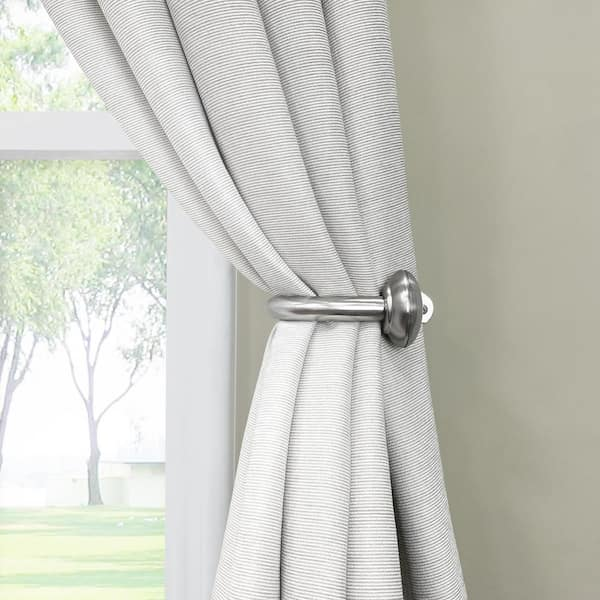
The curtain holdback is an easy method of opening the curtain without pulling it back towards the rail. It provides a fashionable design and decorative appearance for the curtain, bringing greater design-related utility to bedrooms, lounges, and dining rooms.
A wall-mounted holdback is a sturdy steel, wood, or iron structure. The structure is solid, so you do not need tiebacks or ropes to place the curtain. It is satisfying to slide the curtain inside the holdback instead of trying to tie the tieback around the curtain,
Tiebacks can be a hassle and sometimes have a different classy appearance than a tieback. This is the main thing to think about when choosing between tiebacks and holdbacks. Tiebacks are best suited for the bathroom and kitchen, as you close the curtains less frequently. Tiebacks also cause wrinkles on your curtains, making them less attractive when opened.
Wall-mounted curtain holdbacks work well for windows with stationary frames. They are also great when used with curtain rods for sliding doors. A sliding glass door lets the outside world view your home without visual barriers, thus ensuring your privacy.
The installation of a curtain rail can solve the problem; however, it can be a hassle when you need to pull the curtains each time you go into or out of the door. Holdbacks allow you to pull the curtains back away and allow easy entry to the doors while you are moving into and from the space, regardless of the kinds of curtains you choose to use.
How to Install Curtain Holdbacks – A Step-by-Step Guide:
How you place the holdbacks about the distance from the floor and the distance from the wall’s edge impacts the design of your curtain. It is essential to consider aspects like how close the trim you’d like your holdbacks to be to create a particular appearance to the curtain and consistent placement of the holdbacks in the wall.
Before fixing the hang back on the wall
- Place the curtain inside the U-shaped space and place it against the wall.
- Move it upwards and downwards and closer to the outside of the glass to get an idea of the design you’d like to achieve.
- Play around with various widths and heights. Have someone hold it down while you walk away from the curtain to get an even broader perspective of the style it gives.
The most common guideline for where to position curtain holdbacks is that, if you want a complete look towards your curtain’s top, place the holdback approximately 1/3 of the way up from the floor. If you prefer a more full appearance from down, put the holdback about a third from the rail of your curtain.
The standard position hanging back from the windows’ edges should be between one to six inches. As close to it as possible, the larger of the window that it covers when curtains are within the holdbacks.
The holdbacks should be equally spaced to create an attractive, symmetrical aesthetic design. Use a spirit level while installing them to ensure the holdbacks align with the floor. Use a measuring tape to provide an equal distance from the edges of your window from both angles.
Although you could undoubtedly decorate a window with curtains, it’s better when done competently. Here’s a step-by-step guide to making curtain holdbacks work for you to achieve your accurate outcome.
1. Measure the Length of Your Curtains
Measuring the curtains is the first step to successfully setting up your holdback. Begin from the end of the curtain from where it hangs. This means you measure from the eyelet on curtains with eyelets or from the crease of pleated curtains. Make sure you measure from the floor to the eyelet and divide the measurement into three parts.
2. Set the Height of Your Holdback
- Once you have the measurement, lift it from the ground and draw it one-third of the way across the wall using a pencil. Mark the mark at least 3 inches from the edge of the window or wall. You can go to higher levels if you want, but don’t go as far as one-half.
- Additionally, this is determined by the width of the wall covered by the curtain and not that of the drape. This is because some people aren’t happy with their curtains rubbing against the flooring, and others prefer them gathered in an eddy on the floor, too.
- For example, if you have a curtain around 84 inches from the eyelet to the floor, the proper place for the hang back (similar to the guidelines for the rule of thumb) will be about 28 inches from the flooring.
3. Position the Holdback
- After selecting and marking the best place for the holdback:
- You can have someone hold it with the curtain fixed.
- Remain in the middle of the room to look over the style.
Let you move your holds back upwards or downwards and away from or further from your wall until they are in the ideal position and style that is pleasing to you.
If you can find the perfect location for the curtain holdbacks in a way that is pleasing to you, note the spot using a pencil. Get your measuring tape and note the measurements. Make the same marks on the opposite wall. Make sure you’re with the spirit level to ensure that the holdback is in line with the floor when making measurements and markings.
4. Install the Holdback
The holdback comes with the hardware needed to place it. In most cases, you’ll need an electric drill, drill bits, and fasteners to secure the wall. Make sure your marks are accurate before you drill in the wall.
Top Tips for Styling Curtain Holdbacks:
Follow these tips to ensure that your décor appears professional and is not unprofessional or inexperienced.
Secure the Top of the Panels With Safety Pins
If you want to make an attractive style statement and elegant look for your curtains of the holdbacks, employ a safety pin to hold the curtain panels in place in the upper. When curtain rods are removed from the holdbacks, they drop into the closing position. This style gives curtains a flowing appearance when placed within the holdbacks.
Place the Holdback Halfway With Short Curtains
Put the holdback about halfway up the wall if you have short curtains. With the one-third rule, the 36-inch short curtain needs a holdback 12 inches from the ground. Placing it one-third of the length from the bottom of the curtain means that the curtain can be blown out of the holdback in case winds blow into the room.
Create Puddled Drapes by Placing the Holdback Higher-Up
If you’re together drapes with puddles, placing the holdback a third of the width of the floor will create excessively loose fabric when drapes are placed in the holdback. It gives a loose, sloppy look, which blocks the light from the space. Set the holdback at a mid-point on the wall to create the best visual.
FAQs
Should Curtain Holdbacks be Angled?
No. Then, “post” styles are specifically designed to hang perpendicularly from the wall. Others with a hook must be aligned with the ground and parallel to the wall. Don’t incline your curtain holdbacks.
How Far Should Curtain Holdbacks Be From the Wall?
The standard for the correct height of the holdback is between two and three inches from the edge of the wall and approximately one-third of the width of your curtain from the flooring. It is possible to set the holdback up to six inches from the wall to let greater light into the space and make the room appear bigger.
What’s the Difference Between Curtain Holdbacks & Tiebacks?
The curtain holds back an item constructed from iron, steel, or wood. It’s a solid piece of equipment with a U-shape to which you can attach the curtain. Holdbacks are commonly found in dining rooms, lounges, and bedrooms. A tieback is a length of fabric or rope connected to a wall fixture. It is used as a hang back but will hold the curtain in different ways.
What’s the Correct Length for Curtain Tiebacks?
The best length for a curtain tieback is from down to the waist, but not lower than. If the tieback is longer than the ribs, it is too long.
Conclusion:
Incorporating curtain holdbacks into your home décor can significantly enhance the aesthetic and functionality of your curtains. Properly positioning holdbacks is key to achieving a balanced and elegant look. By placing holdbacks about one-third of the way up from the floor and a few inches from the window edge, you can ensure a symmetrical and visually appealing arrangement.
Understanding the differences between holdbacks and tiebacks helps in choosing the right option for various rooms and curtain styles. Holdbacks offer a sturdy and stylish way to manage your curtains, especially for rooms where you frequently open and close the drapes. On the other hand, tiebacks are more suitable for spaces like kitchens and bathrooms where curtains remain closed more often.
When installing curtain holdbacks, it’s essential to measure accurately, mark the spots carefully, and use appropriate tools to secure them. Styling tips such as using safety pins to secure the top of the panels or adjusting the holdback position for short curtains can further enhance the overall look.
By following the step-by-step guide and styling tips provided, you can create a professional and polished appearance for your curtains, adding to the charm and sophistication of your living space.